Professional Cleaning Insights for a Spotless Space
Essential Fall Cleaning Tips for Homes and Offices
Your Hood River Home & Office Refresh Experts
Fall in the Gorge means wind, rain, orchards dropping leaves, and everyone tracking in a little more of the outdoors. Whether it’s your home prepping for holiday guests or your office getting ready for winter traffic, now’s the perfect time for a deep reset. Here’s our proven fall cleaning playbook—designed for real Hood River houses, Airbnbs, breweries, medical offices, and retail spaces.
Residential Fall Deep Clean Checklist
Kitchen
Oven & range hood degreased (goodbye summer BBQ smoke!)
Refrigerator pulled out, coils vacuumed, shelves wiped & organized
Cabinets & drawers wiped inside and out
Grout steam-cleaned (all those dropped apples and pumpkin spices…)
Pantry sweep—toss expired items, wipe shelves
Bathrooms
Shower doors & tracks descaled (hard-water season is coming)
Grout & tile deep steam or probiotic clean
Exhaust fans dusted and sanitized
Baseboards & behind toilets detailed
Living Areas & Bedrooms
Upholstery vacuumed + spot-treated (pet hair & fire-pit nights)
Mattresses vacuumed & rotated
Windows inside + tracks (pollen & fruit-fly season is finally over)
Baseboards, light fixtures, ceiling fans
Air vents & returns dusted or brushed
Whole House Extras
Carpets hot-water extraction or dry-encapsulation (your choice)
Hardwood floors screened & recoated if needed
All light switch plates & door handles sanitized
Entryway mats deep cleaned (or swapped for fresh ones)
Commercial Fall Refresh Checklist
(offices, vacation rentals, breweries, wineries, clinics & retail)
High-dust light fixtures, beams, and pipe runs
All glass doors & windows (inside + out) streak-free
Break-room/kitchenette deep clean: fridge, microwave, coffee bar
Restroom restock + full sanitization (flu-season ready)
Carpet & hard floor deep clean scheduled before holiday parties
Outdoor entryways power-washed (leaf stains & orchard dust gone)
Airbnb/VRBO full turnover package + linen service available
Pro Fall Tips from the Hood River Cleaners Team
Book early — October & November fill up fast with pre-holiday cleans.
Bundle & save: Add carpet or window cleaning to any deep clean and get 15% off the add-on.
Switch to our plant-based probiotic cleaners for the season — they keep eating germs long after we leave (perfect for homes with kids or offices with high traffic).
Vacation rental hosts: Ask about our “Fall Host Reset” — full deep clean + fresh linens + welcome basket restock in one visit.
Let us knock out your entire fall cleaning list so you can actually enjoy sweater weather, windsurfing sunsets, and pumpkin beer without worrying about the mess.
Call or text (503)405-5402 • Message us on Facebook • Book online at hoodrivercleaners.com
Hood River Cleaners – Homes • Offices • Vacation Rentals • Serving the entire Gorge 🌾
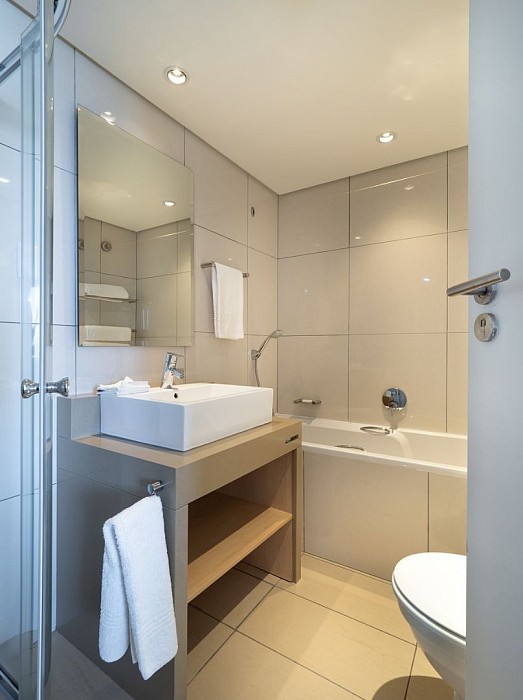
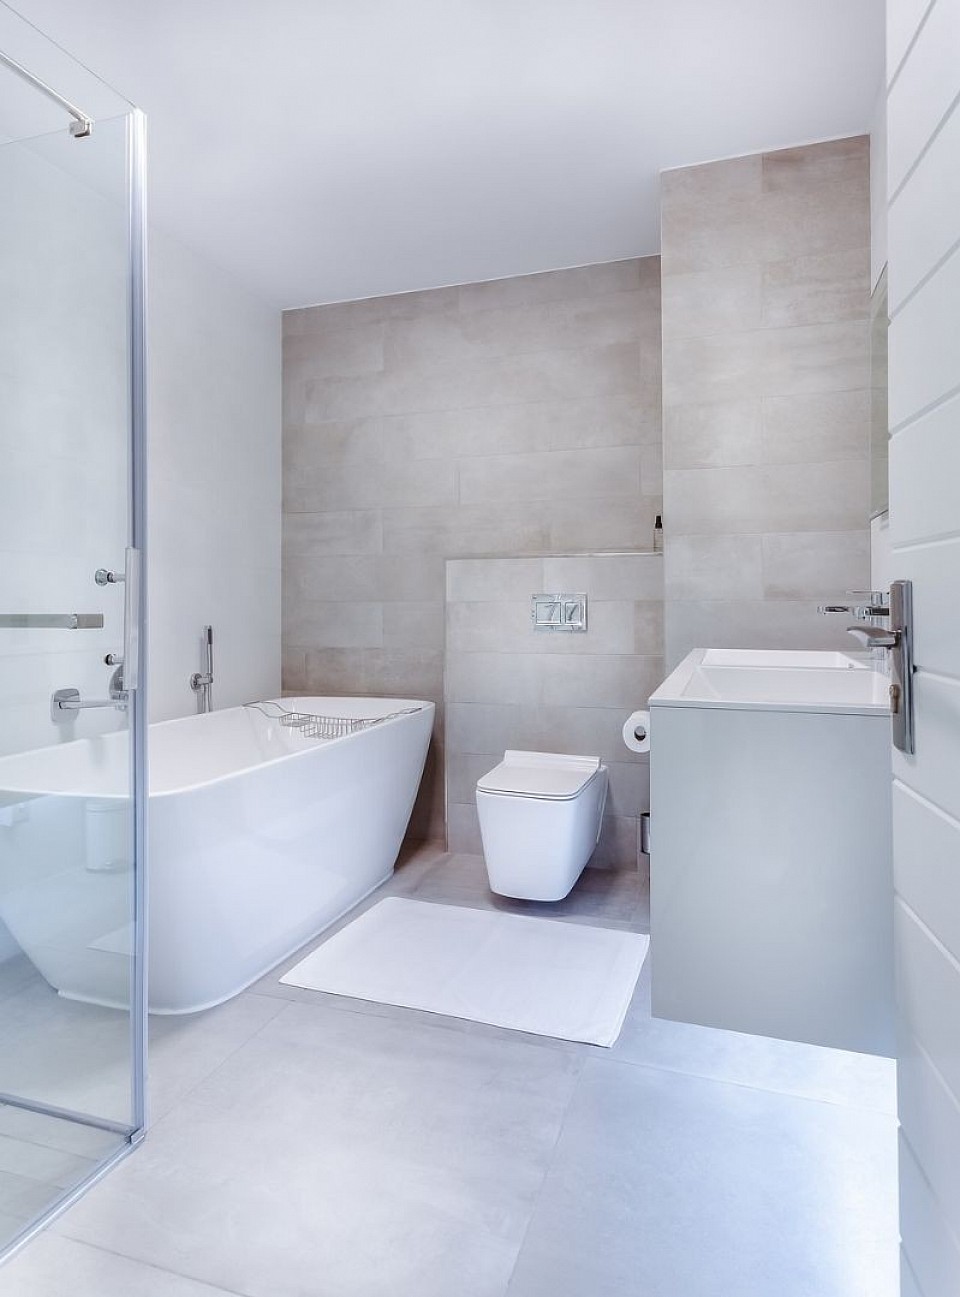
Ensure a Germ-Free Bathroom: Effective Disinfection Methods
1. Gather Your Supplies: Collect your cleaning supplies including disinfectant cleaner, gloves, scrub brush, microfiber cloths, and a toilet brush.
2. Ventilate the Bathroom: Open a window or turn on the exhaust fan to ensure good ventilation.
3. Clear the Surfaces: Remove all items from the bathroom surfaces, such as toiletries, towels, and bath mats.
4. Dust and Sweep: Start by dusting the ceiling, corners, and light fixtures. Then, sweep the floors to remove any loose debris and dust.
5. Spray and Soak: Apply disinfectant cleaner to all surfaces including countertops, sinks, tubs, and toilets. Allow it to sit for the recommended time as per the product instructions.
6. Clean Mirrors and Glass: Use glass cleaner to clean mirrors and any glass surfaces.
7. Scrub the Toilet: Use a toilet brush and disinfectant to thoroughly clean the inside of the toilet bowl, seat, lid, and exterior.
8. Wipe Down Surfaces: Use a clean cloth or sponge to wipe down all surfaces, paying attention to corners, faucets, and handles.
9. Clean the Shower and Tub: Scrub the shower walls, doors, and tub with a suitable cleaner. Pay attention to grout lines and soap scum buildup.
10. Mop the Floor: Use a disinfectant cleaner appropriate for the floor type and mop the entire bathroom floor.
11. Replace Items: Put back all the items you removed from the bathroom surfaces.
12. Dispose of Gloves and Wash Hands: Properly dispose of your gloves and wash your hands thoroughly.
Following these steps should help ensure a thorough and effective disinfection of the entire bathroom.
https://theicebath.com.au/
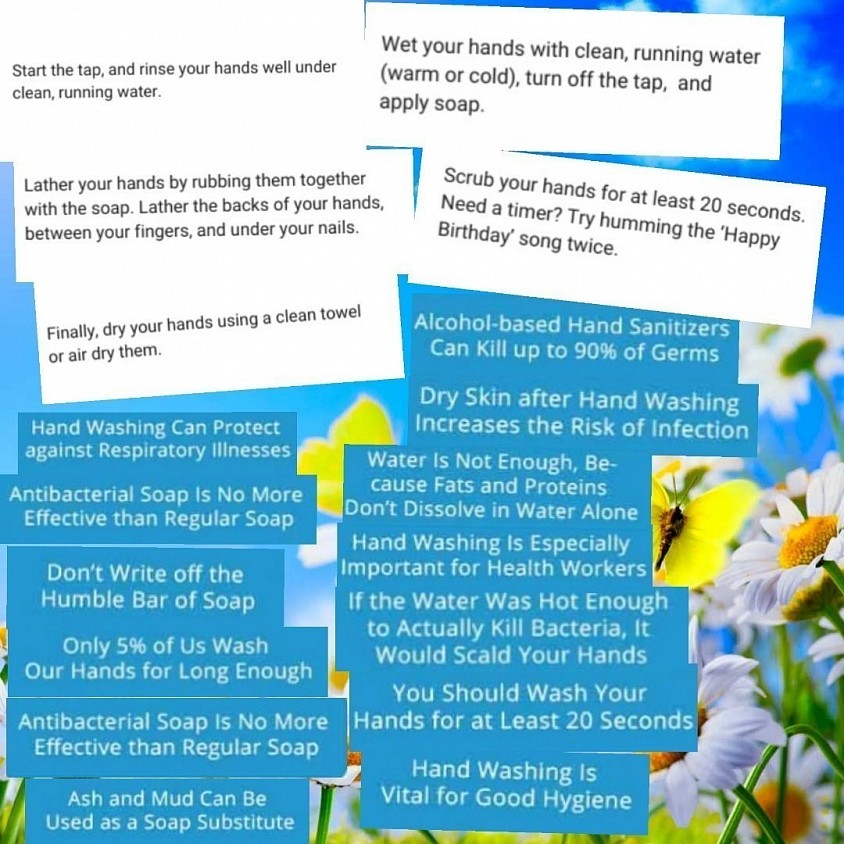
Hand Washing Techniques and Facts This block emphasizes the importance of proper hand washing techniques
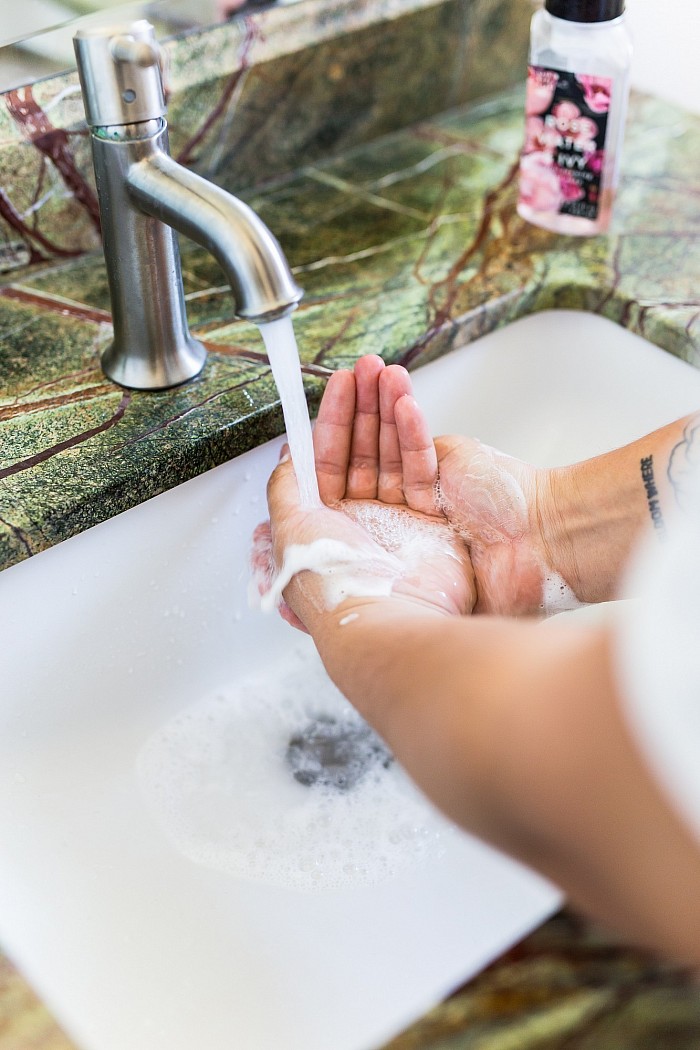
Proper hand washing
Optimize Your Cleaning: Top Mistakes to Avoid
We see these every single week when we arrive for deep cleans. Avoid the damage, save your stuff, and make your home actually cleaner – not just “cleaned.”
Using Vinegar on Natural Stone (granite, marble, travertine)
Vinegar’s acidity etches and dulls the surface forever.
Fix: Use a pH-neutral stone cleaner or plain water + microfiber.
Bleach on Colored Grout
Turns it patchy and actually weakens the grout over time.
Fix: Use an oxygen bleach (like hydrogen peroxide + baking soda) or call us for sealed grout restoration.
Mixing Cleaning Chemicals
Bleach + ammonia = toxic gas. Bleach + vinegar = chlorine gas.
Fix: One product at a time. Rinse between if you must switch.
Vacuuming First, Dusting Second
You just knock everything onto the floor you already vacuumed.
Fix: Dust top-to-bottom first, then vacuum last (we do this on every job).
Paper Towels on Glass & Stainless Steel
Leaves lint and streaks every time.
Fix: Damp microfiber cloth + dry microfiber cloth = zero streaks, zero waste.
Too Much Soap on Hardwood Floors
Leaves sticky film that attracts dirt (and can void warranties).
Fix: Barely damp mop with just a capful of Bona or Black Diamond wood cleaner.
Scrubbing Stains on Carpet Right Away
Rubbing drives the stain deeper.
Fix: Blot (don’t rub) from the outside in with a clean white cloth and cold water first. Call us if it’s red wine or pet accident.
Dish Soap in the Dishwasher
You get a flood of bubbles that leaks everywhere.
Fix: Only automatic dishwasher detergent pods or powder.
Washing Windows in Direct Sun
Cleaner dries before you wipe = permanent streaks.
Fix: Clean on a cloudy day or when the glass is in shade.
Ignoring the Dryer Vent
Hood River’s #1 hidden fire hazard and the reason clothes take 3 cycles to dry.
Fix: Have it professionally cleaned every 1–2 years (we do this too!).
Stop fighting the same grime over and over. Let Hood River Cleaners handle the deep stuff the right way the first time. Your floors, counters, and lungs will thank you.
Ready for a clean that actually lasts?
Call/text (503)405-5402 or book online – mention “No More Mistakes” for a free dryer-vent check with any whole-house deep clean this month.
Hood River Cleaners – We clean it right so you don’t have to do it twice
Comprehensive Guide to Carpet Cleaning Techniques
1. Prepare the area: Remove any furniture or objects from the carpeted area that you plan to clean.
2. Vacuum the carpet: Start by thoroughly vacuuming the carpet to remove loose dirt, dust, and debris. This will make the cleaning process more effective.
3. Treat stains: If you notice any stains on the carpet, apply a stain remover or carpet cleaner specifically designed for the type of stain you're dealing with. Follow the instructions on the product and let it sit for the recommended time.
4. Prepare the cleaning solution: Depending on the type of carpet cleaner you have, dilute it according to the instructions on the packaging. Alternatively, you can make a homemade carpet cleaning solution by mixing warm water with a small amount of mild detergent.
5. Test in an inconspicuous area: Before applying the cleaning solution to the entire carpet, test it in a small, inconspicuous area to ensure it doesn't cause any discoloration or damage.
6. Apply the cleaning solution: Using a carpet cleaner or a clean sponge, apply the cleaning solution to the carpet. Work in small sections, starting from one corner and moving across the entire carpet.
7. Scrub and agitate: Gently scrub the carpet using a soft-bristle brush or a carpet cleaning machine. This helps loosen dirt and grime trapped in the carpet fibers.
8. Let it sit: Allow the cleaning solution to sit on the carpet for the recommended time specified on the product packaging. This allows the solution to penetrate and break down any stubborn stains or dirt.
9. Rinse the carpet: If using a carpet cleaning machine, follow the instructions on the machine to rinse the carpet with clean water. If using a sponge, rinse it with clean water and blot the carpet to remove the cleaning solution.
10. Remove excess moisture: Use a wet/dry vacuum or a clean, absorbent towel to remove excess moisture from the carpet. This helps speed up the drying process.
11. Drying the carpet: Open windows, turn on fans, or use a dehumidifier to promote air circulation and facilitate faster drying of the carpet. Avoid walking on the carpet until it is completely dry.
Enhance Your View: Professional Window Cleaning Tips
Beat the streak. We've all struggled with window streaks at some point in our lives. Try using a mixture of white vinegar and distilled water. If not, a window cleaner you can buy almost anywhere these days will work. Use a microfiber towel, newspaper, or a t-shirt if the other two aren't readily available. Spray your solution onto your weapon of choice; like the newspaper or microfiber towel; and not directly on the window. Paper towels just don't cut it. Spraying cleaner directly on the window will cause it to drip, thus leaving its own streak you now have to contend with. Or you can call the professionals at Hood River Cleaners to come do the job.

Window cleaning tips
Effective Techniques for Clothing Stain Removal
1. Act quickly: The sooner you tackle the stain, the better chance you have of removing it successfully. Blot or gently scrape off any excess substance from the fabric.
2. Identify the stain type: Different stains require different treatment methods. Determine the type of stain you're dealing with (e.g., food, oil, ink, etc.) to select the appropriate stain removal technique.
3. Pre-treat the stain: Before laundering the garment, pre-treat the stain directly. You can use various methods depending on the stain type:
- For food or beverage stains, gently dab the stain with a mixture of dish soap and water.
- For oil-based stains, apply a small amount of liquid dish detergent, rubbing it into the stain gently.
- For ink stains, blot the stain with rubbing alcohol or use an ink stain remover product.
4. Launder as usual: After pre-treating the stain, wash the garment following the care instructions on the label. Use the recommended water temperature and laundry detergent. If the stain persists after washing, do not dry the garment. Instead, repeat the stain removal process or seek professional help.
5. Consider professional help: For stubborn or delicate stains, it's best to consult a professional dry cleaner. They have the expertise and specialized equipment to handle difficult stains and minimize the risk of damage to your clothing.
Remember, it's essential to always test any stain removal method on a small, inconspicuous area of the fabric before applying it to the stain directly. This way, you can ensure it won't cause any unwanted damage or discoloration.
At Hood River Cleaners, we’ve been keeping Hood River garments spotless for years. While many stains can be treated at home, some (especially on delicate fabrics) are best left to our professional care. Here’s our trusted guide:
Cotton & Linen (T-shirts, sheets, tablecloths, khakis)
Tough, forgiving fabrics – act fast!
Blot (never rub) fresh stains with a clean cloth.
Common stains:
– Coffee/Tea: Rinse with cold water from the back, then soak in cold water + a little dish soap.
– Red wine: Cover immediately with salt or white wine, then soak in cold water with enzyme detergent.
– Grease/Oil: Sprinkle with cornstarch or baking soda, let sit 15 min, brush off, then treat with dish soap before washing.
Wash in the hottest water safe for the fabric.
Wool (Sweaters, suits, coats)
Delicate – heat and agitation can cause shrinking or felting.
Blot gently; never rub.
Treat with cold water and a wool-safe detergent (like Woolite).
Ink: Dab with hairspray (alcohol-based) or place stain facedown on paper towels and sponge the back with rubbing alcohol.
Bring wool garments with set-in or unknown stains to us – we use gentle, professional solvents.
Silk (Blouses, ties, dresses)
Extremely delicate and water-sensitive.
Blot only – do not use water unless the care label allows it.
Blood: Dab with cold water or hydrogen peroxide (test first!).
Makeup/Oil: Sprinkle with talcum powder or cornstarch, let sit several hours, then gently brush off.
Most silk stains should come straight to Hood River Cleaners – we have silk-safe spotting agents.
Polyester & Synthetics (Activewear, uniforms)
Generally sturdy and stain-resistant.
Pre-treat with a paste of baking soda + water or a stain stick.
Wine, grass, and ink usually come out with regular washing after pre-treatment.
For stubborn deodorant marks: Sponge with white vinegar before laundering.
Rayon & Viscose (Dresses, lightweight blouses)
Acts like cotton when wet but can shrink or lose shape.
Blot gently, treat with cool water and mild detergent.
Avoid hot water and vigorous rubbing.
When in doubt – bring it in!
Leather & Suede (Jackets, boots, purses)
Never use water on large areas.
Blot liquids immediately with a dry cloth.
Food/oil: Sprinkle with cornstarch, let absorb, brush off gently.
Salt stains (winter boots): Mix 1 part white vinegar + 1 part water, dab lightly, wipe with clean damp cloth.
We offer professional leather cleaning and reconditioning in-house.
Delicate Beaded or Sequined Garments
Spot test only – bring these to us. Attempting home treatment can cause beads to fall off or colors to bleed.
Quick Rule of Thumb:
The faster you act, the better your chances. Always check care labels first, and when a stain is old, oil-based, or on a delicate fabric, trust the experts at Hood River Cleaners. Drop off your stained items at our Hood River location – we’ll make them look new again!
Need same-day service or have a tricky stain? Give us a call at (503)405-5402 or bring it by today
Eco-Conscious Cleaning: How We Protect the Planet
Serving Homes & Businesses with a Lighter Footprint
We’re proud to keep Hood River offices, vacation rentals, and family homes sparkling while protecting the rivers, orchards, and trails we all love. Here’s how we clean green – without cutting corners on results.
Our Core Eco Practices
100% biodegradable, plant-based cleaners (no phosphates, no chlorine, no dyes)
EPA Safer Choice & Green Seal certified products only
Microfiber cloths & mop heads that trap 99% of dirt with just water (we launder and sanitize them in-house)
HEPA-filter backpack vacuums that capture dust instead of blowing it back into the air
Low-moisture & steam cleaning whenever possible – uses up to 90% less water
Refillable spray bottles & bulk purchasing to eliminate single-use plastic
Electric vehicles & optimized routing for all pickup/drop-off services in Hood River
Our Most Popular Green Products & Services
All-Purpose Plant Magic Cleaner
Made with essential oils and coconut-based surfactants. Cuts grease, kills germs, and smells like lemongrass or lavender (your choice). Safe on granite, wood, stainless steel – everything.
Probiotic Floor Cleaner
Good bacteria that keep eating dirt and odors for days after we leave. Perfect for vacation rentals and homes with pets or kids.
Zero-Waste Refill Station (at our shop)
Bring your own bottle and refill All-Purpose, Glass, or Bathroom cleaner for $4–$6 each. Locals love it!
Green Carpet & Upholstery Cleaning
Hot-water extraction with biodegradable encapsulators – no sticky residue, dries in 1–2 hours, safe for kids and pets the moment we’re done.
Eco Window Cleaning
Pure water + telescoping poles (no chemicals, no ladders, no streaks). Leaves windows cleaner longer because there’s zero soap residue to attract dirt.
Commercial Green Program
Designed for offices, breweries, medical clinics, and Airbnbs. Includes day porter service, color-coded microfiber to prevent cross-contamination, and monthly usage reports so you can show your customers you’re eco-conscious.
Real Hood River Impact
Every cleaning we do saves an average of 35 gallons of water compared to traditional methods and keeps harsh chemicals out of the Columbia watershed.
Ready for a spotless space that’s actually good for the planet?
Book your residential or commercial cleaning today – same-day and recurring schedules available.
Hood River Cleaners – Keeping the Gorge clean, one green clean at a time ♻️🌲
Kitchen Tile Care: Essential Cleaning Techniques
Daily/Weekly Maintenance (Quick & Easy)
Sweep or vacuum first to remove loose dirt, crumbs, and debris (use a vacuum with a hard-floor setting to avoid scratching).
Mop with a pH-neutral cleaner — These are safe for both tiles (ceramic, porcelain, etc.) and sealed grout without degrading the sealant or etching the surface.
Top recommendations: Bona Stone, Tile & Laminate Floor Cleaner, Better Life Natural Floor Cleaner, or Black Diamond Stoneworks Tile & Grout Cleaner.
Avoid vinegar, bleach, or acidic cleaners for routine use — they can weaken grout over time.
Use a microfiber mop and change the water often to avoid redistributing dirt.
Dry the floor with a clean towel or microfiber cloth to prevent water spots and mildew in grout lines.
This keeps things looking good and makes deep cleans easier.
Deep Cleaning Grout (When It's Noticeably Dirty or Discolored)
Kitchen grout often gets greasy and dark — here's what reliably restores it:
Best DIY Option (Natural & Highly Effective)
Hydrogen peroxide + baking soda paste (often with a squirt of dish soap like Dawn):
Mix: ½ cup baking soda + ¼ cup hydrogen peroxide + 1 tsp dish soap → forms a spreadable paste.
Apply to grout lines with a toothbrush or grout brush.
Let sit 10–30 minutes (it fizzes and lifts dirt).
Scrub along the lines, then mop/rinse thoroughly.
This is one of the top-tested homemade methods — it whitens and degreases without harsh fumes.
Alternative natural paste: Baking soda + a little water (or vinegar if your grout is sealed and not natural stone) — but hydrogen peroxide outperforms vinegar in most tests.
Best Commercial Option for Tough Grime
Zep Grout Cleaner & Brightener (acid-based) — testers and pros consistently rate as the fastest and most dramatic for blackened kitchen grout.
Squeeze directly on grout, wait 3–10 minutes, light scrub, rinse well.
Wear gloves and ventilate — it's strong but incredibly effective.
Other strong performers: Goo Gone Grout & Tile Cleaner, Clorox Plus Tile & Grout Cleaner, or Clean-eez Grout Cleaner.
Easiest No-Scrub Option
A steam mop or handheld steam cleaner (like Bissell or Dupray models) — the high-heat steam loosens grease and kills bacteria without chemicals. Great for sealed grout and routine deep cleans.
Extra Tips for Kitchen Floors
Clean spills immediately (especially oil/grease) to prevent staining.
After deep cleaning, apply a grout sealer (like 511 Impregnator or Aqua Mix) once a year — it creates a barrier so dirt doesn't penetrate as easily.
For very bad grout, oxygen bleach (like OxiClean) soaked for hours can work wonders without acid.
Avoid bleach pens or straight bleach long-term — they can discolor or crumble grout.
If the grout is beyond cleaning (cracked or missing), consider regrouting or a grout colorant pen for a quick refresh.
With the hydrogen peroxide/baking soda method or Zep, most people see night-and-day results in one session. Do a spot test first if you have colored or natural-stone tiles!
Step-by-Step Carpet Stain Removal Techniques
amazing carpet stain removal tip that you can try at home.
🔹 Step 1: Act quickly! The sooner you address the stain, the better the chances of successful removal.
🔹 Step 2: Blot, don't rub! Gently dab the stain with a clean cloth or paper towel to absorb as much liquid as possible.
🔹 Step 3: Prepare a DIY stain remover. Mix 1 tablespoon of dish soap with 2 cups of warm water. Stir until it creates a soapy solution.
🔹 Step 4: Test in an inconspicuous area. Apply a small amount of the solution to an unseen part of the carpet to ensure it doesn't cause any damage or discoloration.
🔹 Step 5: Treat the stain. Using a clean cloth, gently apply the soapy solution to the stain, starting from the outer edges and working your way inward. Be careful not to oversaturate the carpet.
🔹 Step 6: Blot, rinse, and repeat. Blot the stained area with a clean cloth, then rinse with cold water. Repeat the process until the stain is no longer visible.
🔹 Step 7: Dry thoroughly. Use a fan or open windows to speed up the drying process. Avoid walking on the damp carpet until it's completely dry.
Remember, if you're dealing with a stubborn or large stain, it's always best to consult professional carpet cleaners like us at Hood River Cleaners. We're here to assist you with any carpet cleaning needs, providing top-notch service and expertise. 🌟🧹
Sparkling Ovens: Essential Cleaning Techniques
KeepingHow to Clean Your Oven: A Step-by-Step Guide your oven clean not only enhances its efficiency but also prolongs its lifespan. Here’s a simple guide to help you get your oven sparkling clean:
What You’ll Need:
- Baking soda
- White vinegar
- Water
- Soft cloths or sponges
- A spray bottle
- Optional: rubber gloves (to protect your hands)
Step-by-Step Instructions:
1. Gather Your Supplies: Collect all your cleaning materials and make sure you have everything at hand before you start.
2. Prepare the Oven: Remove any visible debris or loose food particles from the oven. Don’t forget to take out the racks too; they need some love too!
3. Make a Cleaning Paste: In a small bowl, mix baking soda with a few tablespoons of water to create a thick paste. Adjust the water until you reach the desired consistency.
4. Apply the Paste: Spread the baking soda paste all over the interior surfaces of your oven, avoiding the heating elements. Give extra attention to tough, greasy spots.
5. Let It Sit: Allow the paste to sit for at least 12 hours—or overnight. This allows the baking soda to break down stubborn grime.
6. Wipe It Down: After the waiting period, use a damp cloth to wipe away the baking soda paste. You may need to rinse the cloth several times to remove all residue.
7. Spray with Vinegar: Fill a spray bottle with white vinegar and spray it on any remaining areas where you see baking soda residue. This reaction will help lift the last bits of grime.
8. Final Wipe: Give it one last wipe with a clean, damp cloth. Your oven should now be sparkling clean!
9. Clean the Racks: Don’t forget the racks! You can soak them in warm, soapy water and scrub with a sponge to remove any grease.
10. Enjoy Your Clean Oven: Now that your oven is clean, sit back and enjoy cooking your favorite meals in a fresh, spotless environment!
Protect Your Space: Effective Virus Elimination Strategies
We prioritize your safety and well-being. In today's challenging times, it's imperative to address the importance of eliminating harmful viruses, including the notorious coronavirus. We understand the concerns surrounding hygiene and sanitation, and we are here to provide you with expert solutions to keep your environment virus-free.
At Hood River Cleaners, we utilize cutting-edge techniques and industry-approved protocols to ensure effective virus eradication. Our team is trained extensively in the latest cleaning and disinfection methods, enabling us to provide you with a comprehensive and reliable service.
Here are some of the best practices we employ to eliminate and prevent the spread of viruses:
1. Thorough Disinfection: We employ hospital-grade disinfectants to sanitize surfaces, paying close attention to high-touch areas like doorknobs, light switches, and countertops. This meticulous approach helps remove harmful viruses lurking on surfaces.
2. Advanced Cleaning Equipment: Our state-of-the-art cleaning equipment and tools allow us to reach every nook and cranny, ensuring a deep and thorough cleaning process. By using the right equipment, we maximize the effectiveness of our virus elimination efforts.
3. Proper Ventilation: Adequate ventilation plays a crucial role in preventing the spread of viruses. We recommend optimizing airflow in your space to reduce the risk of airborne transmission. Our team can guide you on how to achieve optimal ventilation for your specific needs.
4. Regular Cleaning Schedule: Consistency is key when it comes to virus prevention. We can assist you in developing a customized cleaning schedule tailored to your business, ensuring that high standards of cleanliness are maintained consistently.
5. Education and Awareness: We believe that knowledge is power. Our team is well-versed in the latest scientific research and best practices in virus prevention. We can provide you with valuable information and guidance on maintaining a clean and safe environment.
Your safety is our top priority at Hood River Cleaners. By choosing our services, you can rest assured that you are taking proactive steps to safeguard your health and the well-being of those around you.
Contact us today to learn more about our virus elimination services and how we can help you maintain a clean and healthy environment. Together, we can keep harmful viruses at bay and prioritize your peace of mind.
Maximize Savings: Smart Energy Practices for Your Home
Money saving tips: power bills
We understand the importance of maintaining a comfortable living space while also being mindful of your energy consumption. In this section, we will share some valuable tips on how to keep your energy bills low and ensure that your home stays cozy during the colder months.
1. Insulation: Proper insulation is key to reducing heat loss and maintaining a comfortable indoor temperature. Make sure your attic, walls, and floors are well-insulated to prevent heat from escaping. Consider adding weatherstripping around doors and windows to seal any gaps or drafts.
2. Programmable Thermostats: Installing a programmable thermostat allows you to set different temperatures for different times of the day. This way, you can lower the heat when you're away or asleep and raise it when you're at home. This simple adjustment can lead to significant energy savings over time.
3. Energy-Efficient Appliances: Upgrade to energy-efficient appliances such as washing machines, refrigerators, and HVAC systems. These appliances are designed to use less energy while still providing optimal performance. Look for appliances with the ENERGY STAR® label to ensure maximum efficiency.
4. Lighting: Switching to LED or CFL bulbs can greatly reduce your energy consumption. These bulbs use less electricity and last longer than traditional incandescent bulbs. Additionally, remember to turn off lights when not in use and take advantage of natural light during the day.
5. Air Leaks: Identify and seal any air leaks in your home. Common culprits include gaps around windows and doors, electrical outlets, and pipes. Properly sealing these areas will prevent cold drafts from entering your home and help retain heat.
6. Efficient Heating Systems: Regular maintenance of your heating system is essential for its optimal performance. Clean or replace filters as recommended and schedule professional inspections to ensure your system is running efficiently. Consider upgrading to a high-efficiency furnace or heat pump for long-term energy savings.
7. Energy Audits: Consider conducting an energy audit of your home. Professional auditors can assess your energy usage and identify areas where you can improve efficiency. They may provide recommendations specific to your home's needs, helping you prioritize energy-saving upgrades.
At Hood River Cleaners, we believe that energy efficiency and a comfortable home go hand in hand. By implementing these simple yet effective strategies, you can reduce your energy bills, minimize your environmental impact, and create a cozy living space for you and your family.
Restore Your Tiles: Expert Stain Removal Techniques
Removing wood stain from porcelain tile can be challenging, but it can be done with the right approach. Here are some steps you can follow:
Materials Needed:
- Clean cloths or paper towels
- Mild dish soap
- Water
- White vinegar
- Baking soda
- Rubbing alcohol or acetone (for tougher stains)
- Plastic scraper or credit card
- Gloves (to protect your hands)
Steps to Remove Wood Stain:
1. Act Quickly: If the stain is fresh, try to blot up as much of it as possible with a clean cloth or paper towel. Do not rub, as this may spread the stain.
2. Soap and Water: Mix a few drops of mild dish soap with warm water. Use a clean cloth to apply the soapy water to the stained area. Gently scrub the area with a soft cloth until the stain begins to lift.
3. Vinegar Solution: If soap and water don’t fully remove the stain, mix equal parts of white vinegar and water. Apply the solution to the stain and let it sit for 5-10 minutes before wiping it away with a clean cloth.
4. Baking Soda Paste: For stubborn stains, make a paste with baking soda and water. Apply the paste to the stained area and let it sit for 15-20 minutes, then scrub gently with a cloth or a soft-bristled brush. Rinse with water afterward.
5. Rubbing Alcohol or Acetone: If the stain persists, you can try using rubbing alcohol or acetone. Dampen a cloth with the alcohol or acetone and gently rub the stained area. Be sure to test a small, inconspicuous area first to ensure that it won't damage the tile.
6. Scraping: For any remaining residue, use a plastic scraper or an old credit card to gently scrape away the stain. Be careful not to scratch the tile.
7. Rinse: After using any cleaning solution, rinse the area thoroughly with clean water to remove any residue. Dry with a clean cloth.
8. Repeat if Necessary: You may need to repeat some of the steps if the stain doesn’t come off completely.
Tips:
- Always test cleaning solutions in an inconspicuous area first to ensure they won't damage your tile.
- Avoid using abrasive cleaners or tools, as they can scratch the surface of porcelain tiles.
- If the stain is particularly stubborn or if you are unsure about the cleaning process, consider consulting a professional.
By following these steps, you should be able to effectively remove wood stain from your porcelain tile.
Other notable options:
Goff Off
Neutral Detergent
Hydrogen Peroxide
Steam Cleaner
Mixture of Baking Soda, White Vinegar, Warm Water, and a small amount of Detergent.
For the toughest stains you can try:
Diluted Muriatic Acid (industrial strength solution)
Essential Steps for Starting Your Garden with Mycelium
Embarking on your backyard gardening journey is an exciting and rewarding endeavor. To start, assess your backyard's sunlight exposure, soil quality, and available space. Once you've chosen your garden area, follow these steps to create a flourishing garden that yields large, delicious vegetables and fruits:
1. Soil Preparation: Begin by preparing the soil. Ensure it's well-draining and nutrient-rich. Incorporate organic matter like compost or well-rotted manure to enhance soil fertility.
2. Selecting Plants: Choose vegetables and fruits that thrive in your local climate and are suitable for your garden size. Consider factors such as the length of your growing season and the space available for each plant to spread out.
3. Planting: Follow planting guidelines for each type of vegetable or fruit. Pay attention to spacing recommendations to allow ample room for growth. Consider using companion planting techniques to maximize space and enhance plant health.
4. Watering and Feeding: Provide consistent watering, especially during dry periods. Consider installing drip irrigation for efficient water use. Additionally, supplement the soil with organic fertilizers to ensure steady growth and fruit development.
5. Sunlight: Ensure that your garden receives adequate sunlight. Most vegetables and fruits thrive in full sun, which generally means at least 6 hours of direct sunlight per day.
6. Mycelium Incorporation: Consider introducing mycelium into your garden. Mycelium, the root structure of fungi, can work symbiotically with plants, enhancing nutrient uptake and improving soil structure. Utilizing mycelium-based products or incorporating mushroom compost can contribute to healthier, more robust plant growth.
7. Pest Management: Implement natural pest control methods such as companion planting, using beneficial insects, and practicing crop rotation to minimize pest issues.
8. Harvesting: Harvest your vegetables and fruits at the peak of ripeness for the best flavor. Frequent harvesting also encourages more production.
By following these steps and integrating mycelium into your gardening practices, you can establish a bountiful garden yielding large, flavorful produce. Embracing the natural synergy between plants and mycelium can lead to improved soil health, nutrient absorption, and ultimately, more vibrant and delicious fruits and vegetables.
Frozen pipe prevention is crucial for your home
Protect Your Home: Prevent Frozen Pipes This Winter
"During colder periods, it's crucial to take precautions to prevent your pipes from freezing. Start by insulating any exposed pipes, especially in unheated areas like basements, attics, and crawl spaces. Let faucets drip slightly to keep water flowing, reducing the risk of freezing. Additionally, maintaining a consistent temperature in your home, even when away, can help prevent freezing. If you're leaving for an extended period, consider draining the water system. By taking these steps, you can safeguard your pipes from freezing and avoid potential damage."
Optimize Comfort: Professional AC Installation Insights
1. Choose the Right Size:
- Ensure your AC unit is appropriately sized for your space. An oversized unit can cool too quickly without dehumidifying the air.
2. Location Matters:
- Install the unit in a shaded area, away from direct sunlight. This allows it to operate more efficiently.
3. Professional Installation:
- For central systems, consider hiring a professional to ensure proper installation and avoid future issues.
4. Duct Sealing:
- If you have ducts, make sure they are sealed properly to prevent cool air from escaping..
